How to Set Up File Uploads Tutorial
Uploading and Updating Files
To employ an image or a certificate (such equally a PDF) on your website, yous need to first upload information technology to Pour.
Copyright Annotation: As a reminder, editors should just apply images for which Brandeis holds the copyright (taken by the academy lensman) or stock images that they have purchased rights to use.
Earlier uploading, here are a few all-time practices to proceed in mind:
-
Create separate folders for images and documents — this will make finding things easier later.
-
Prepare your images before uploading using Photoshop or similar software. This volition help foreclose epitome baloney and long page load time caused by large files.
-
Use PDFs sparingly. PDFs must be made accessible before being uploaded.
Visit the Sizing and Editing Images page to review a list of appropriate image sizes.
Best Practice: We recommend Adobe Photoshop for image editing. More information is available at go.brandeis.edu/software.
Uploading a File
-
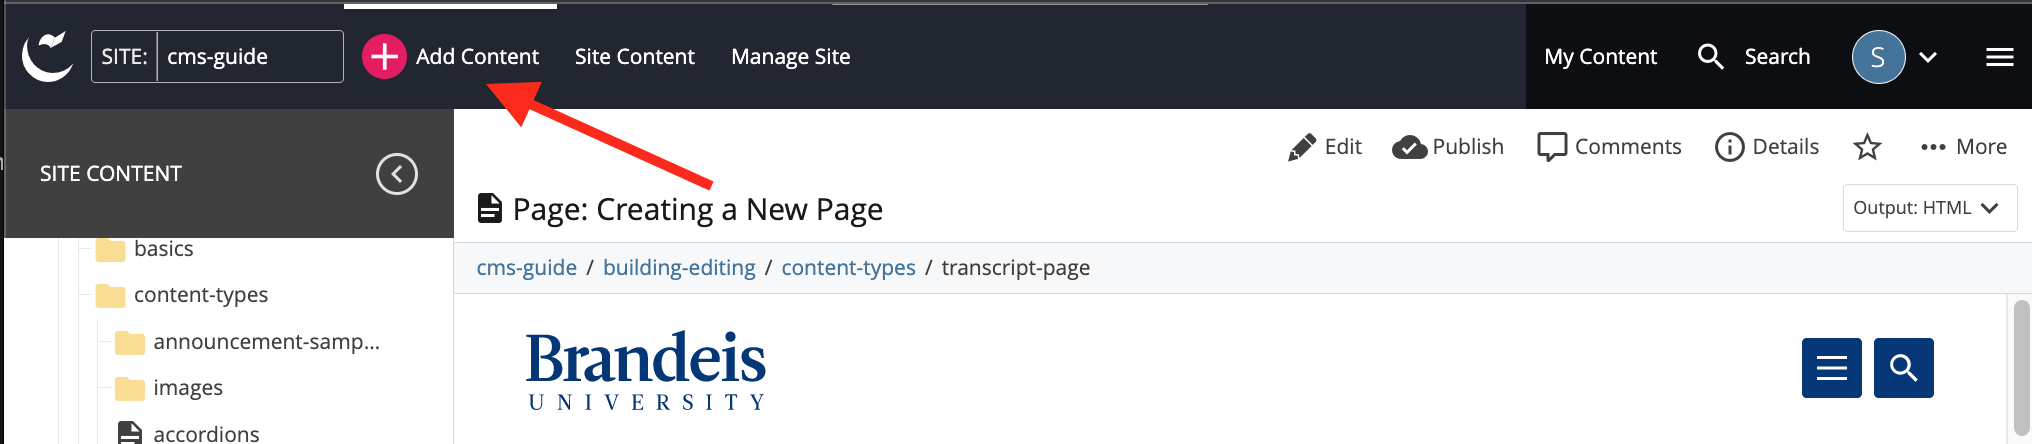
In the Site Content menu, select the folder into which you would like to upload the file.
-
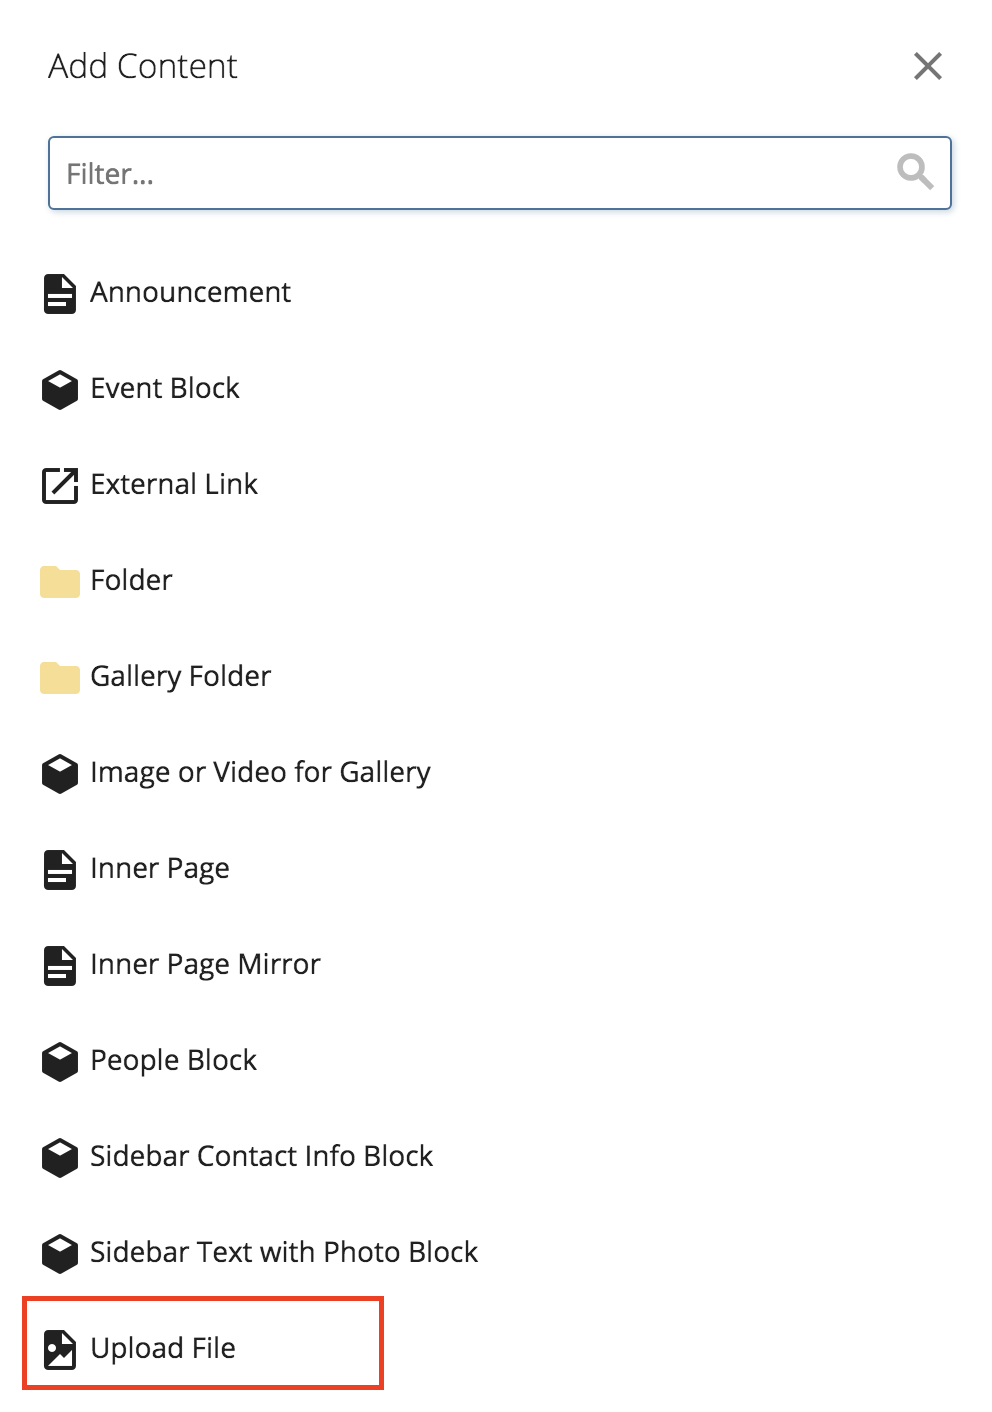
From the toolbar, select the (+)Add together Content bill of fare. Then, select Upload File.
- Browse method: To browse to your image, click the word "choose" in the dotted-line rectangle. Locate and select 1 or more files on your computer. Then click Open.
- Drag-and-driblet method: Or, simply select ane (or more) files from your desktop and drag it into the "Drop file here to upload" rectangle. Your image(s) will appear on the screen.
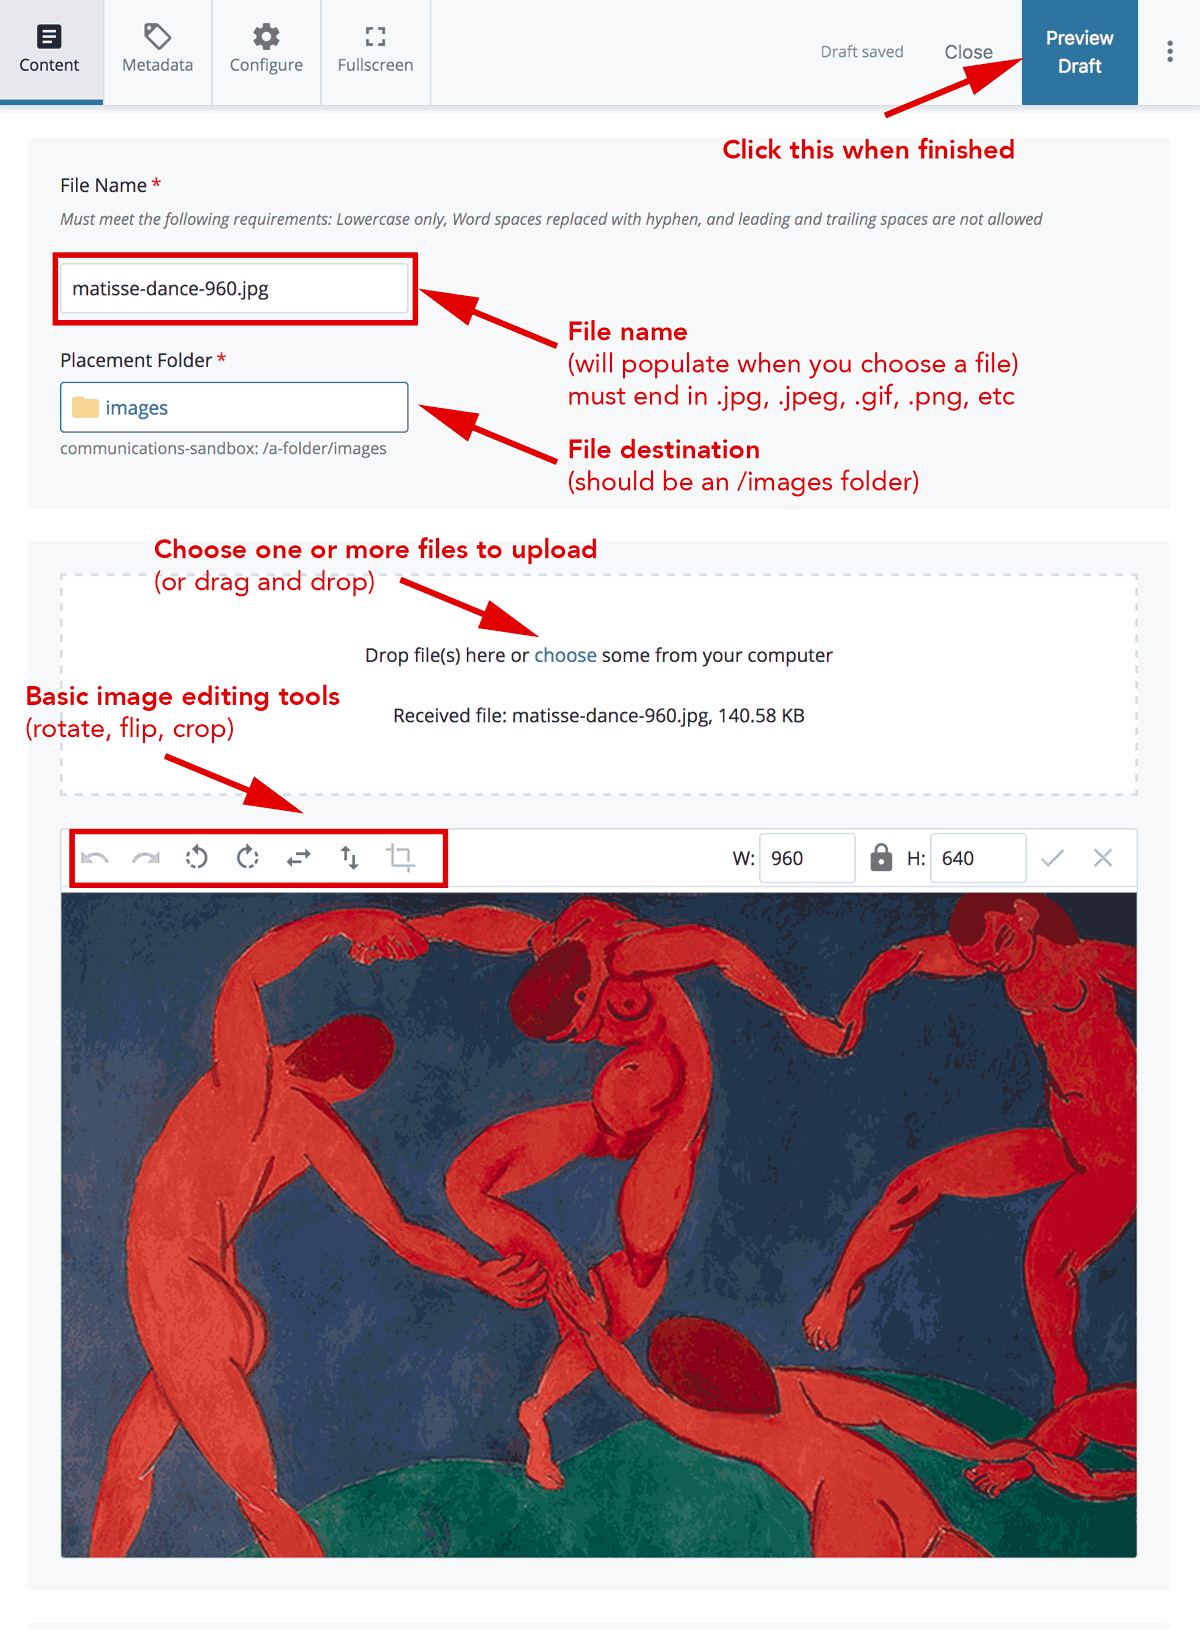
The file name of the file you uploaded will appear in the File Proper name box. Your image will announced nether, where you can perform basic image editing. edit the size or orientation (every bit a reminder, images should exist sized properly before uploaded to the CMS).
If the file you uploaded has spaces or capital messages in its File Name, please follow step 5. If not, skip to step half dozen.
- You must remove spaces in filenames to prevent cleaved images and links. Enter a new File Name for the file by deleting spaces and/or changing capital messages to lowercase letters. This is the name that will appear in the navigation panel and as role of the URL of the file. Be certain to include the file blazon, i.e., .jpg, .pdf, etc., in the title.
All-time Exercise: Keep names short; use simply lowercase letters, numbers, and dashes. Exercise non utilize spaces or underscores.
-
In one case y'all are done, click the three dots ("kabob" menu) next to Preview Draft at the pinnacle right. Click the blueish Check Content & Submit button, then click the checkbox to relieve your work.
The file will announced in the specified folder in the system. Y'all can at present use it on a page.
How to Upload Multiple Files at One time
Multiple files, such as images and PDFs may be uploaded to the CMS at the same fourth dimension by only selecting multiple files or by uploading a nada annal file. Scout a video tutorial at the bottom of this page.
Uploading private files
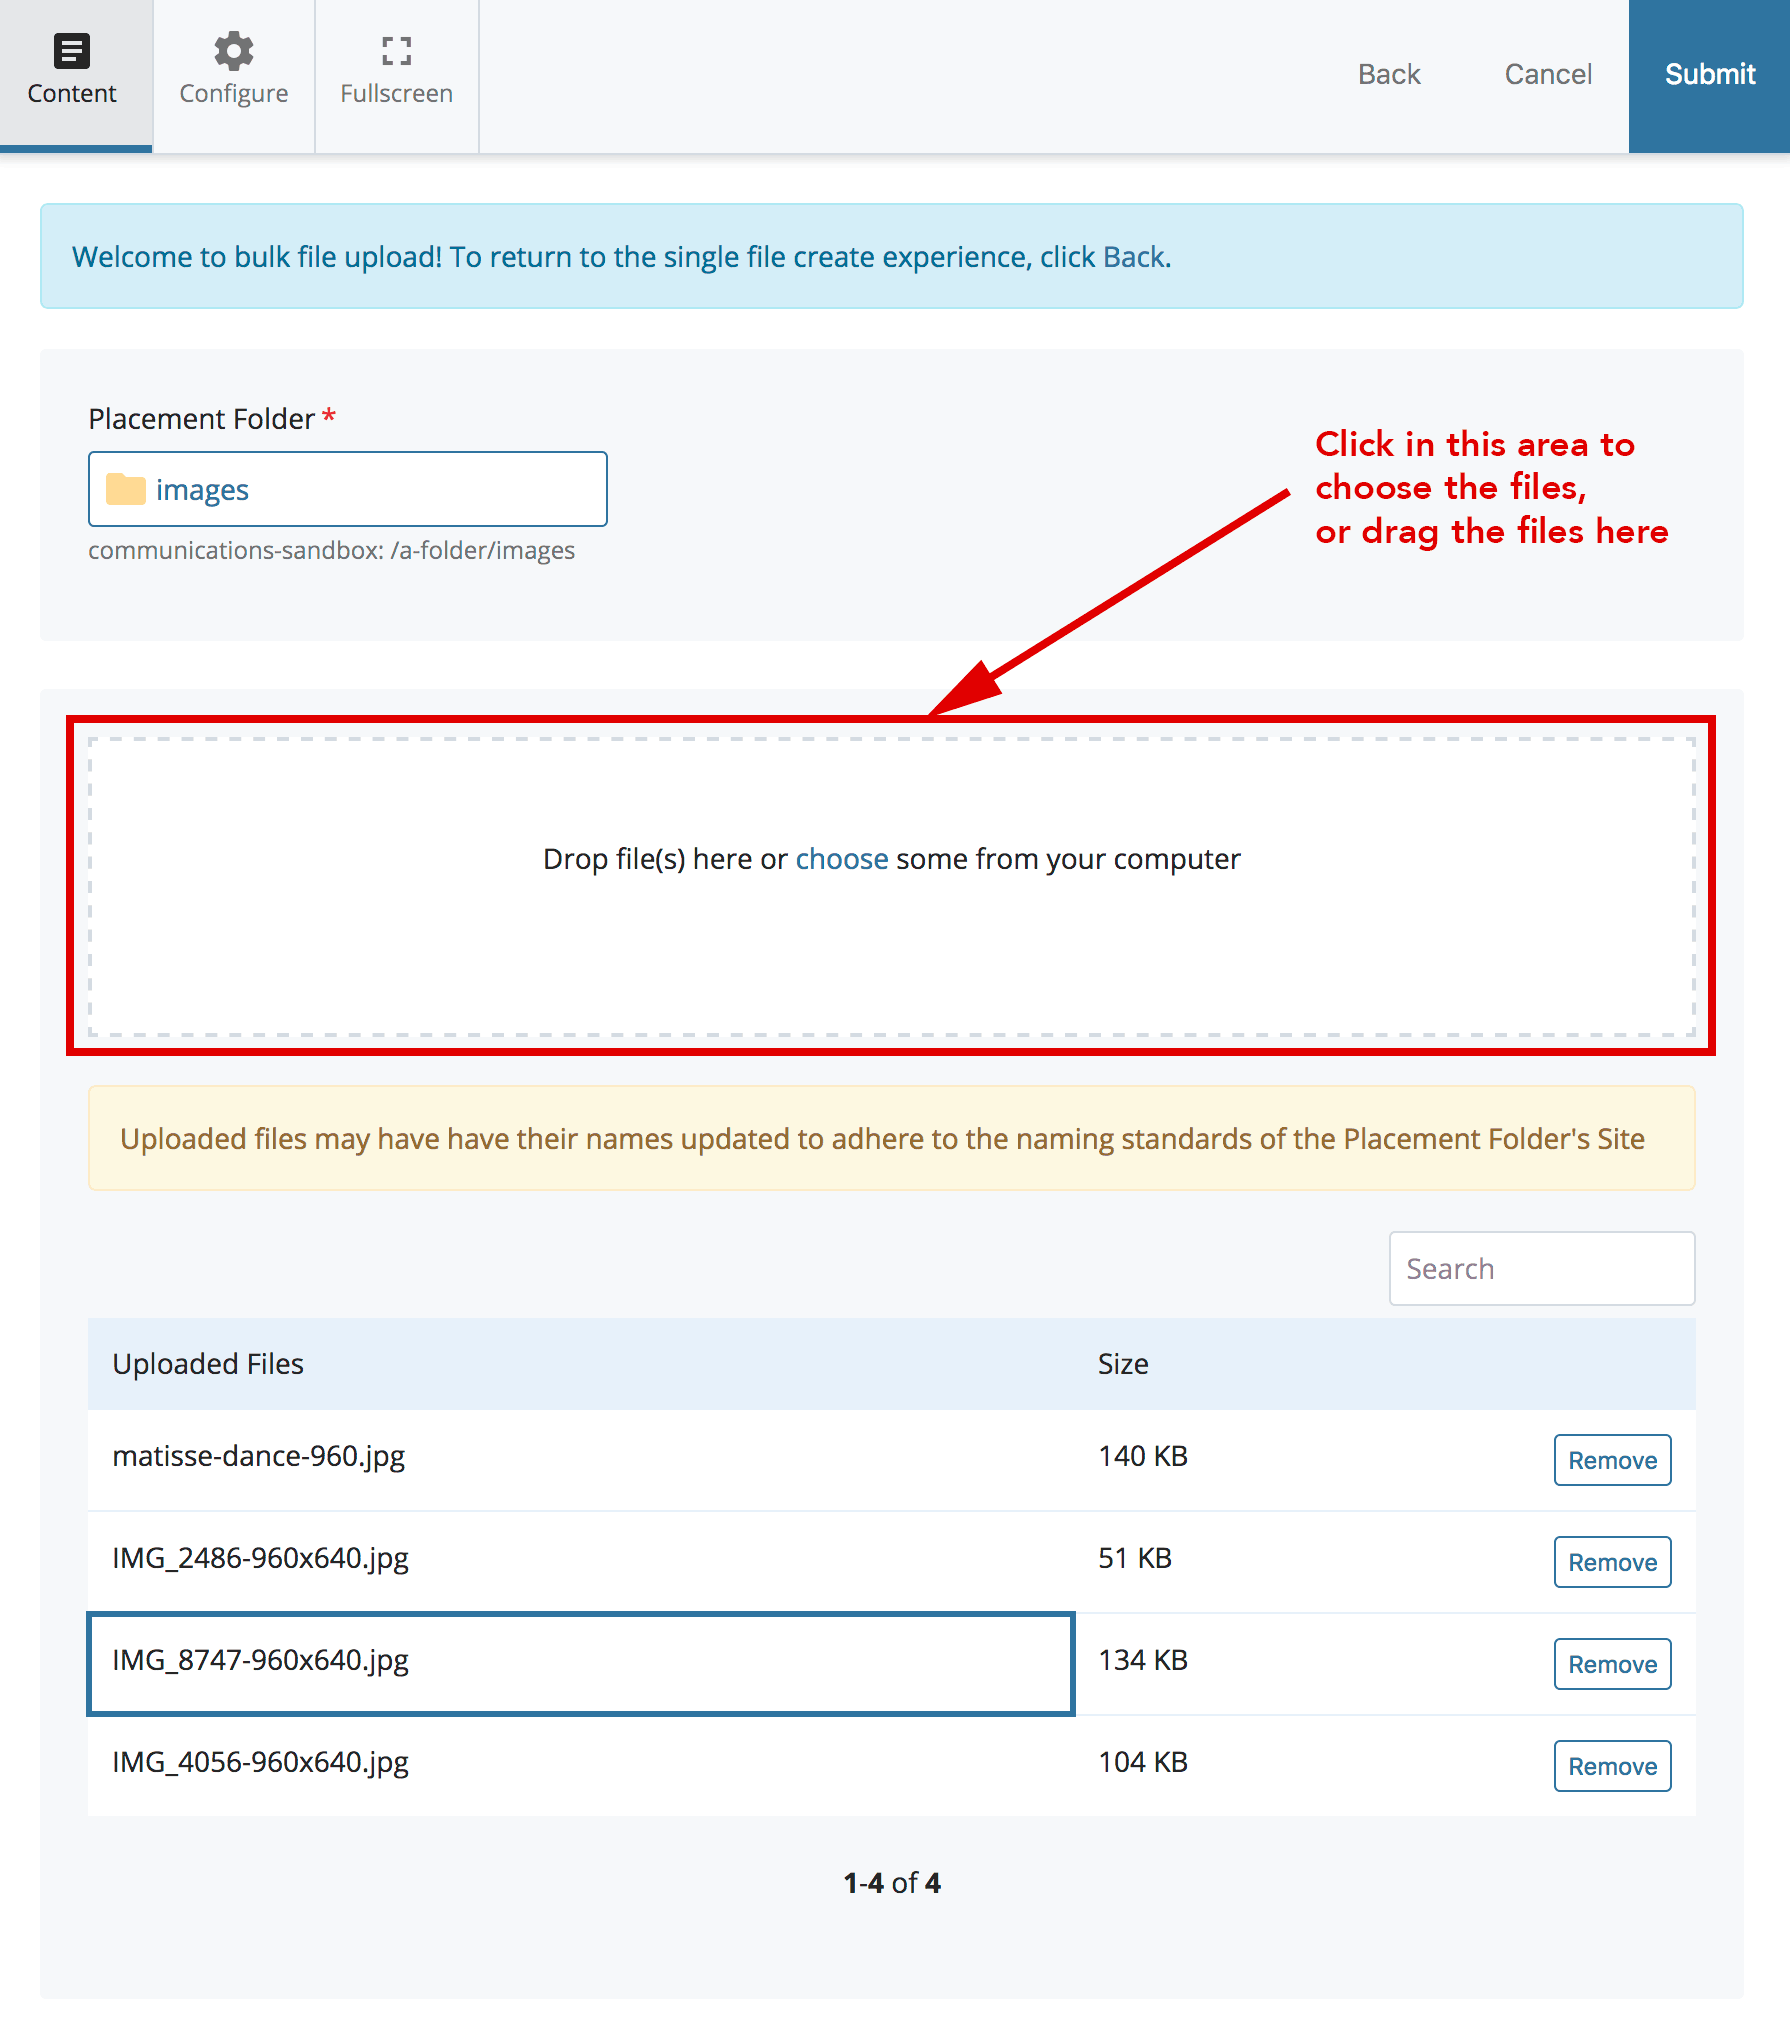
Merely follow the instructions in a higher place, simply instead of selecting or dragging a single file, you can select or drag multiple files. This works with both the "Browse" method and the "Drag and Driblet" method. It works with PDFs and image files. Afterwards the files upload, you volition see the screen below, then simply click Submit.
Uploading a Cipher Archive
As an culling to uploading private files, the system will accept and automatically unpack a compressed .zip file.
- On your computer, create a zipped archive of the items you wish to upload. The name of the file should exist Archive.nothing.
- In the CMS, select the binder in which the items volition be placed.
- From the toolbar, select (+)Add Content > File Upload as to a higher place.
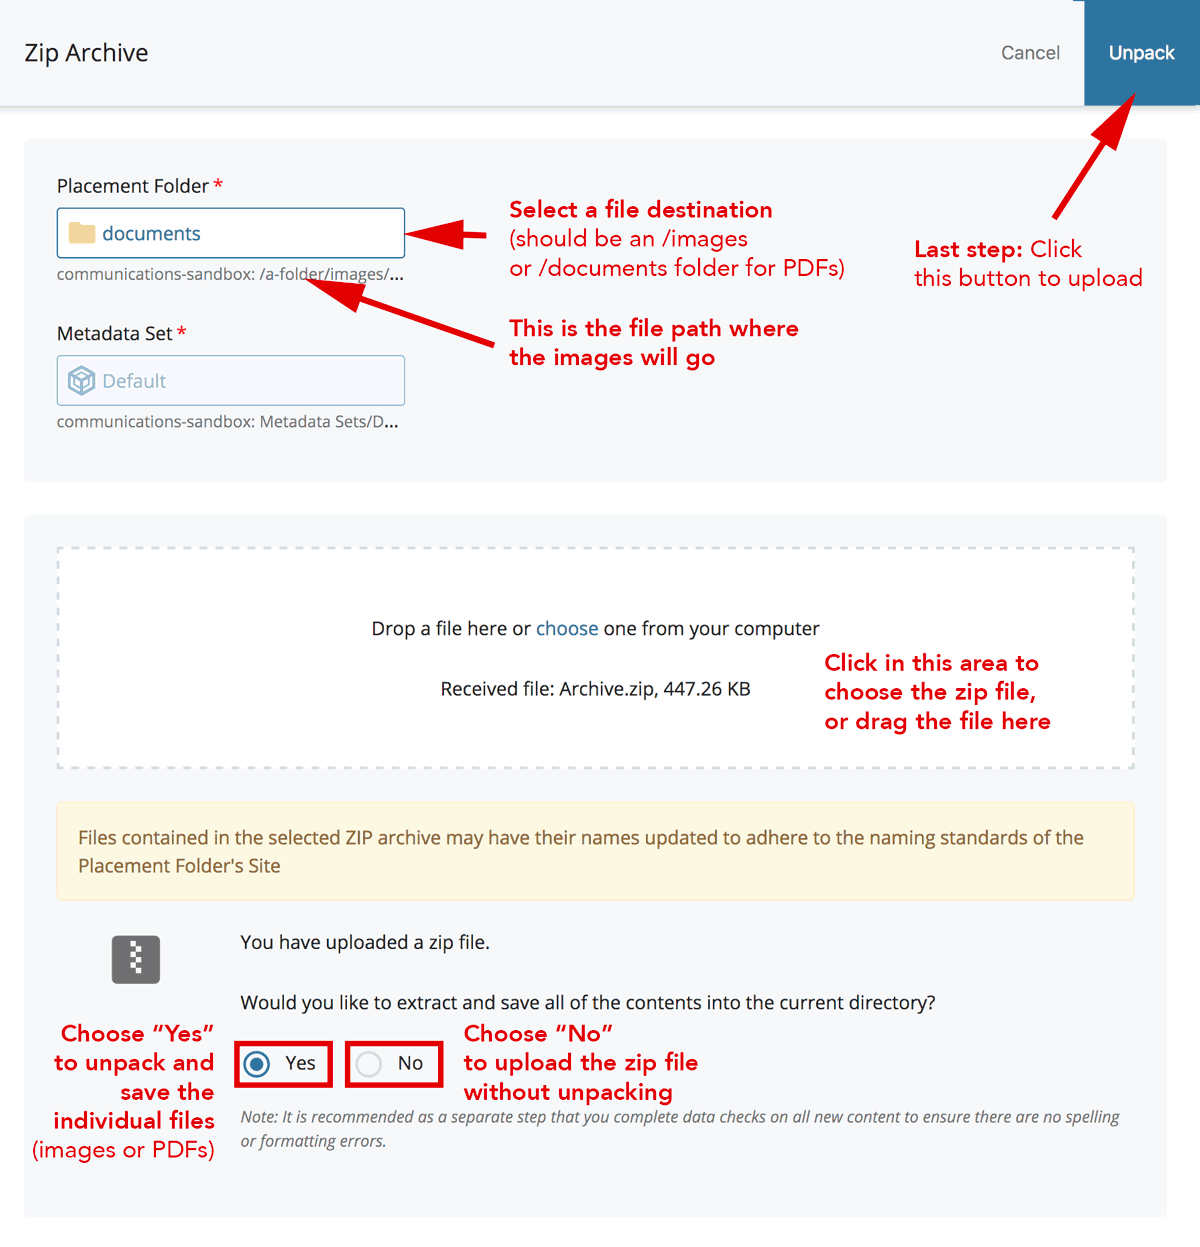
- Select the Annal.zip file from your desktop by either dragging and dropping it or by browsing.
- Cull Yes under "Would you lot like to excerpt and salve all of the contents into the electric current directory?
- Click the bluish Unpack button in upper right
- You will come across a Successfully unpacked bulletin if the files are uploaded correctly.
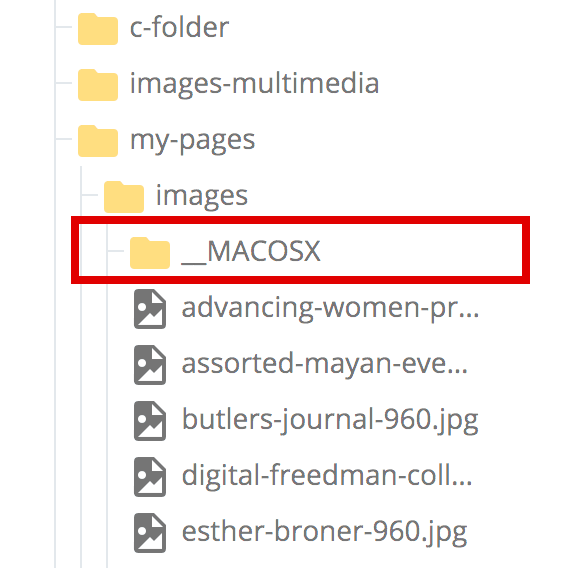
- Mac users may encounter a folder Mac_OSX imported with your images. This folder and all its contents may be safely deleted.
Updating/Replacing a File (PDF, prototype)
If you've previously uploaded a file to Pour, you lot tin can update/supervene upon information technology with a newer version without starting from scratch. Replacing the file has a major advantage: the links you and other spider web editors accept created will be maintained by Pour.
- Select the file you need to update. Click Edit.
- Using the Browse button or "drag and drib" functionality, upload the new version of the file to the CMS. For instructions, see "Uploading a File (PDF, image)" higher up. One time yous select the file, its file proper noun volition appear next to Received file. Click Submit. The new file will appear using the old file name.
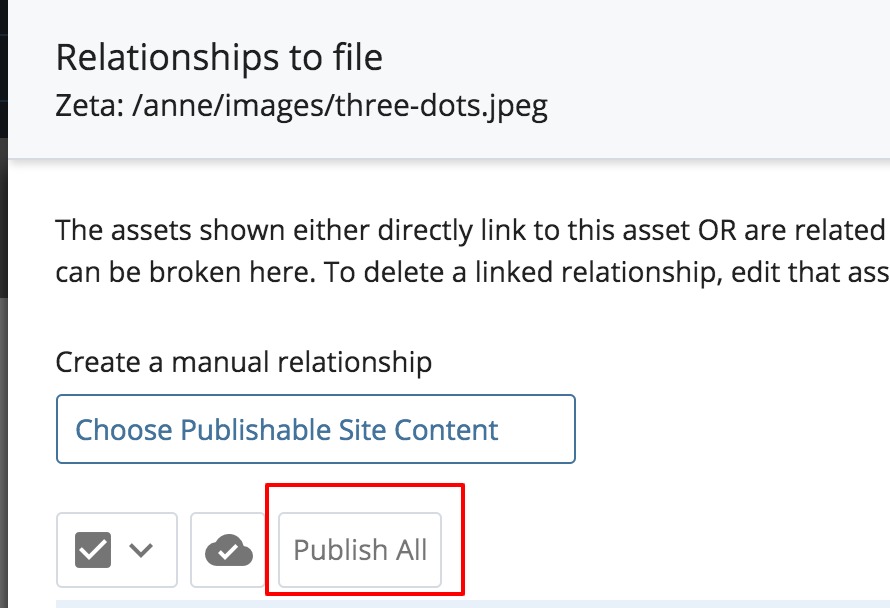
- While the file is selected, click on Relationships. The pages with links to the file volition be displayed.
- Click Publish all relationships.
If you demand to rename a file, follow the Motion/Rename instructions.
Source: https://www.brandeis.edu/cms-guide/building-editing/basics/uploading-files.html
0 Response to "How to Set Up File Uploads Tutorial"
Post a Comment